The Journey of a Scarf
Artisan Scarf Lady takes you through the Journey of making a Felted scarf with silk textures.
Hi, my name is Karen and I thought I would take you through the process of how I make one of my scarves.
It is strange, the paths we find ourselves on in life, and how as you progress through your own discipline, you forget that others only ever see the end result, and often have no idea how the piece came to be in existence.
Over time, I have had customers ask if I “paint the colours onto the wool?”, or say “Oh you MADE the fabric! How?”
So here is the journey of one scarf :)
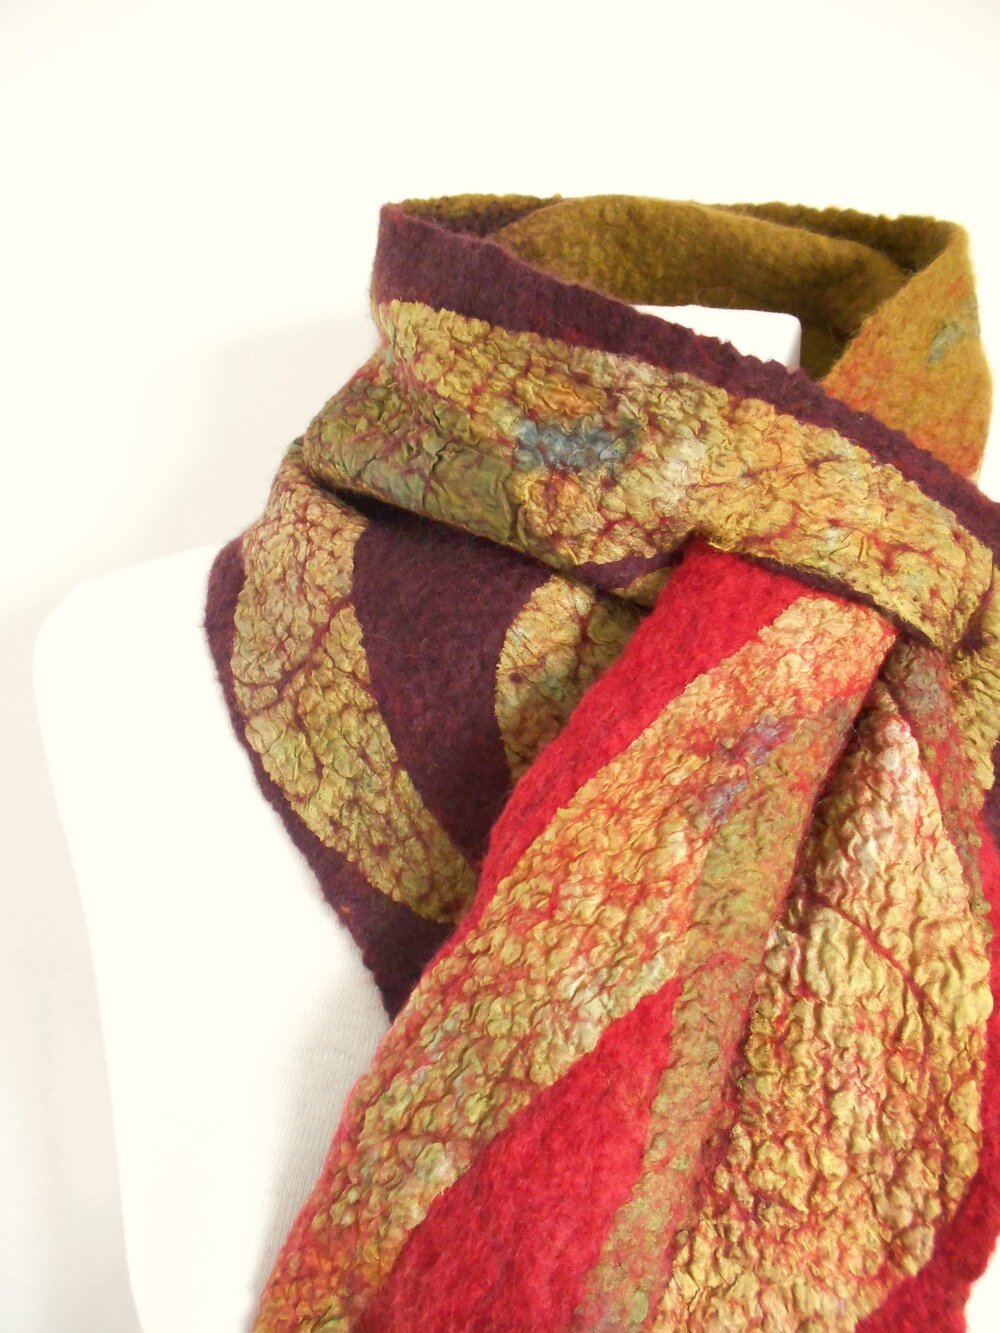
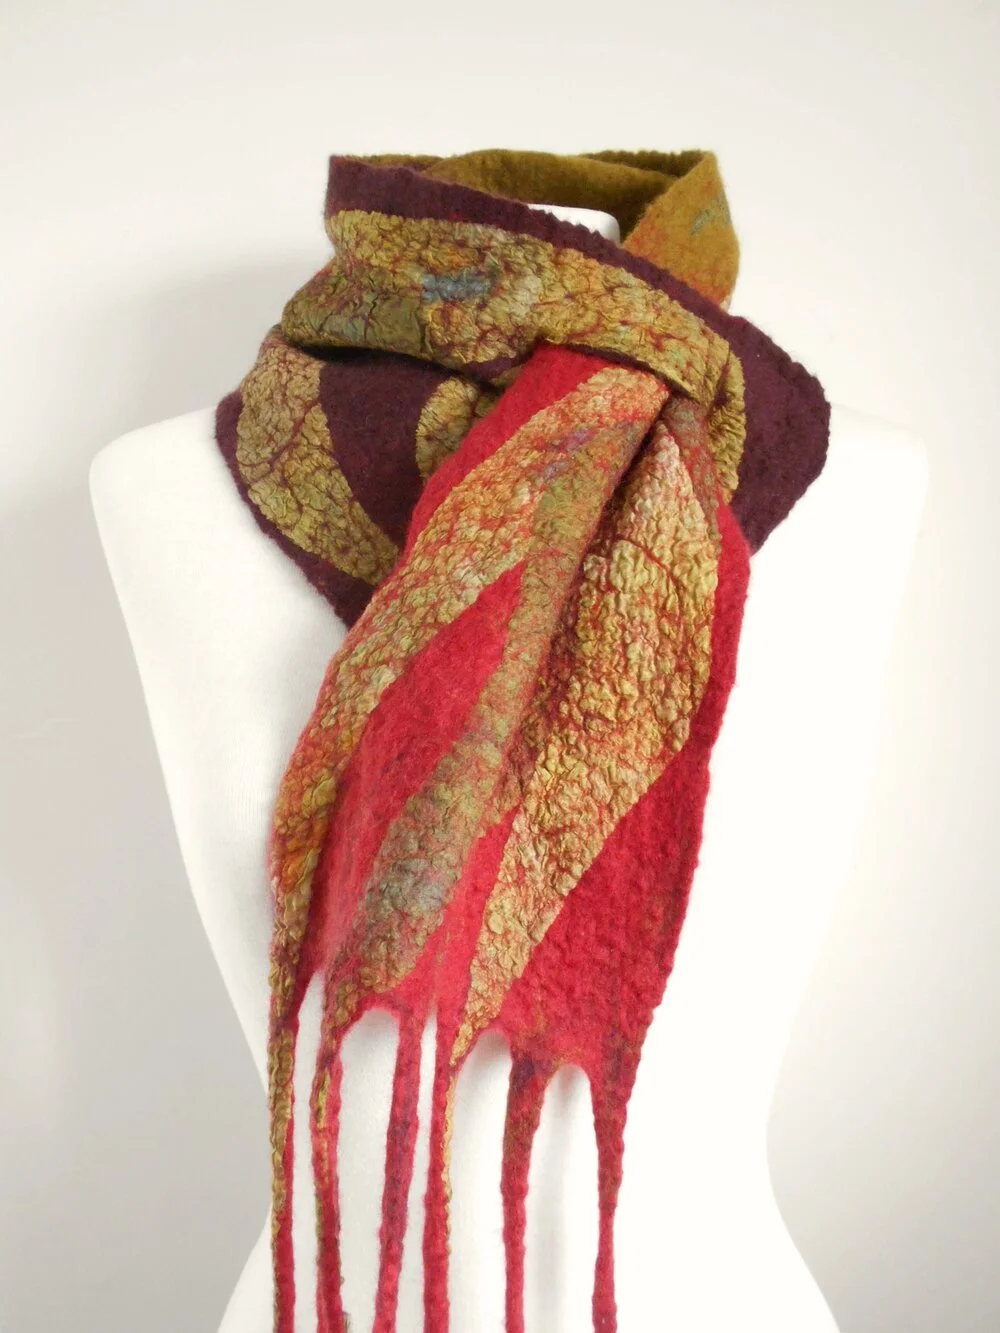
One off Merino wool scarf with silk fabric texture
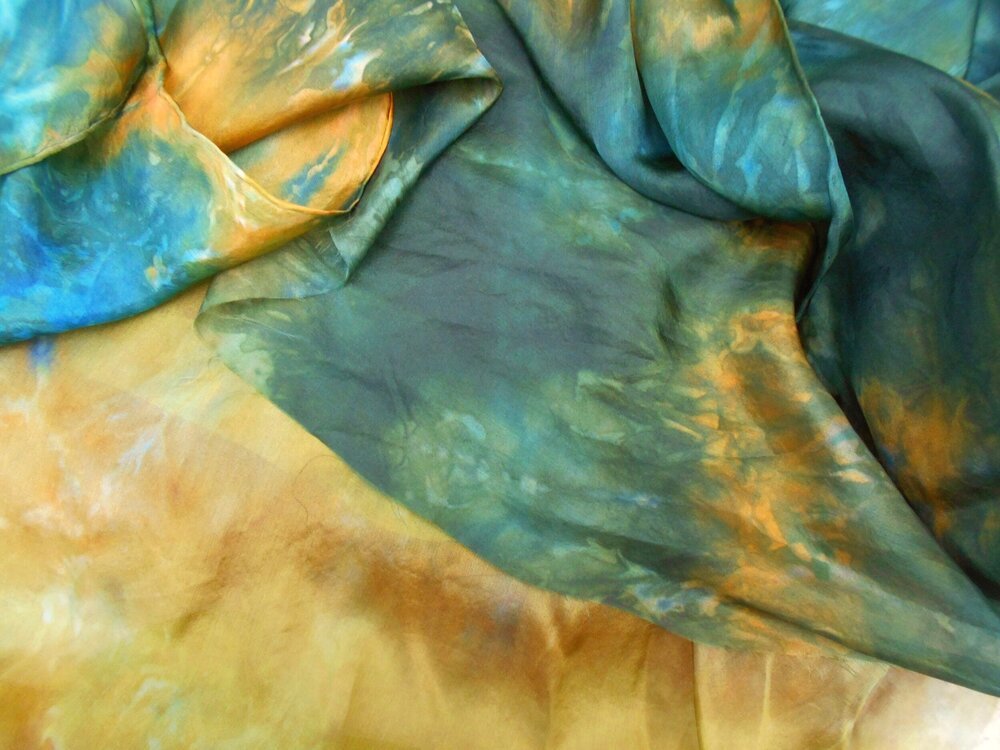
A bundle of hand dyed silk fabric
The process starts with dyeing up silk fabric. I use a very lightweight silk and will dye up a whole batch of different pieces in one go.
I work directly with the dyes, often using different quantities and saturation. As the colours merge together, different patterns will form, always making each piece unique by it’s nature. One of my favourite combinations, is using orange and blue dyes to create various shades of green!
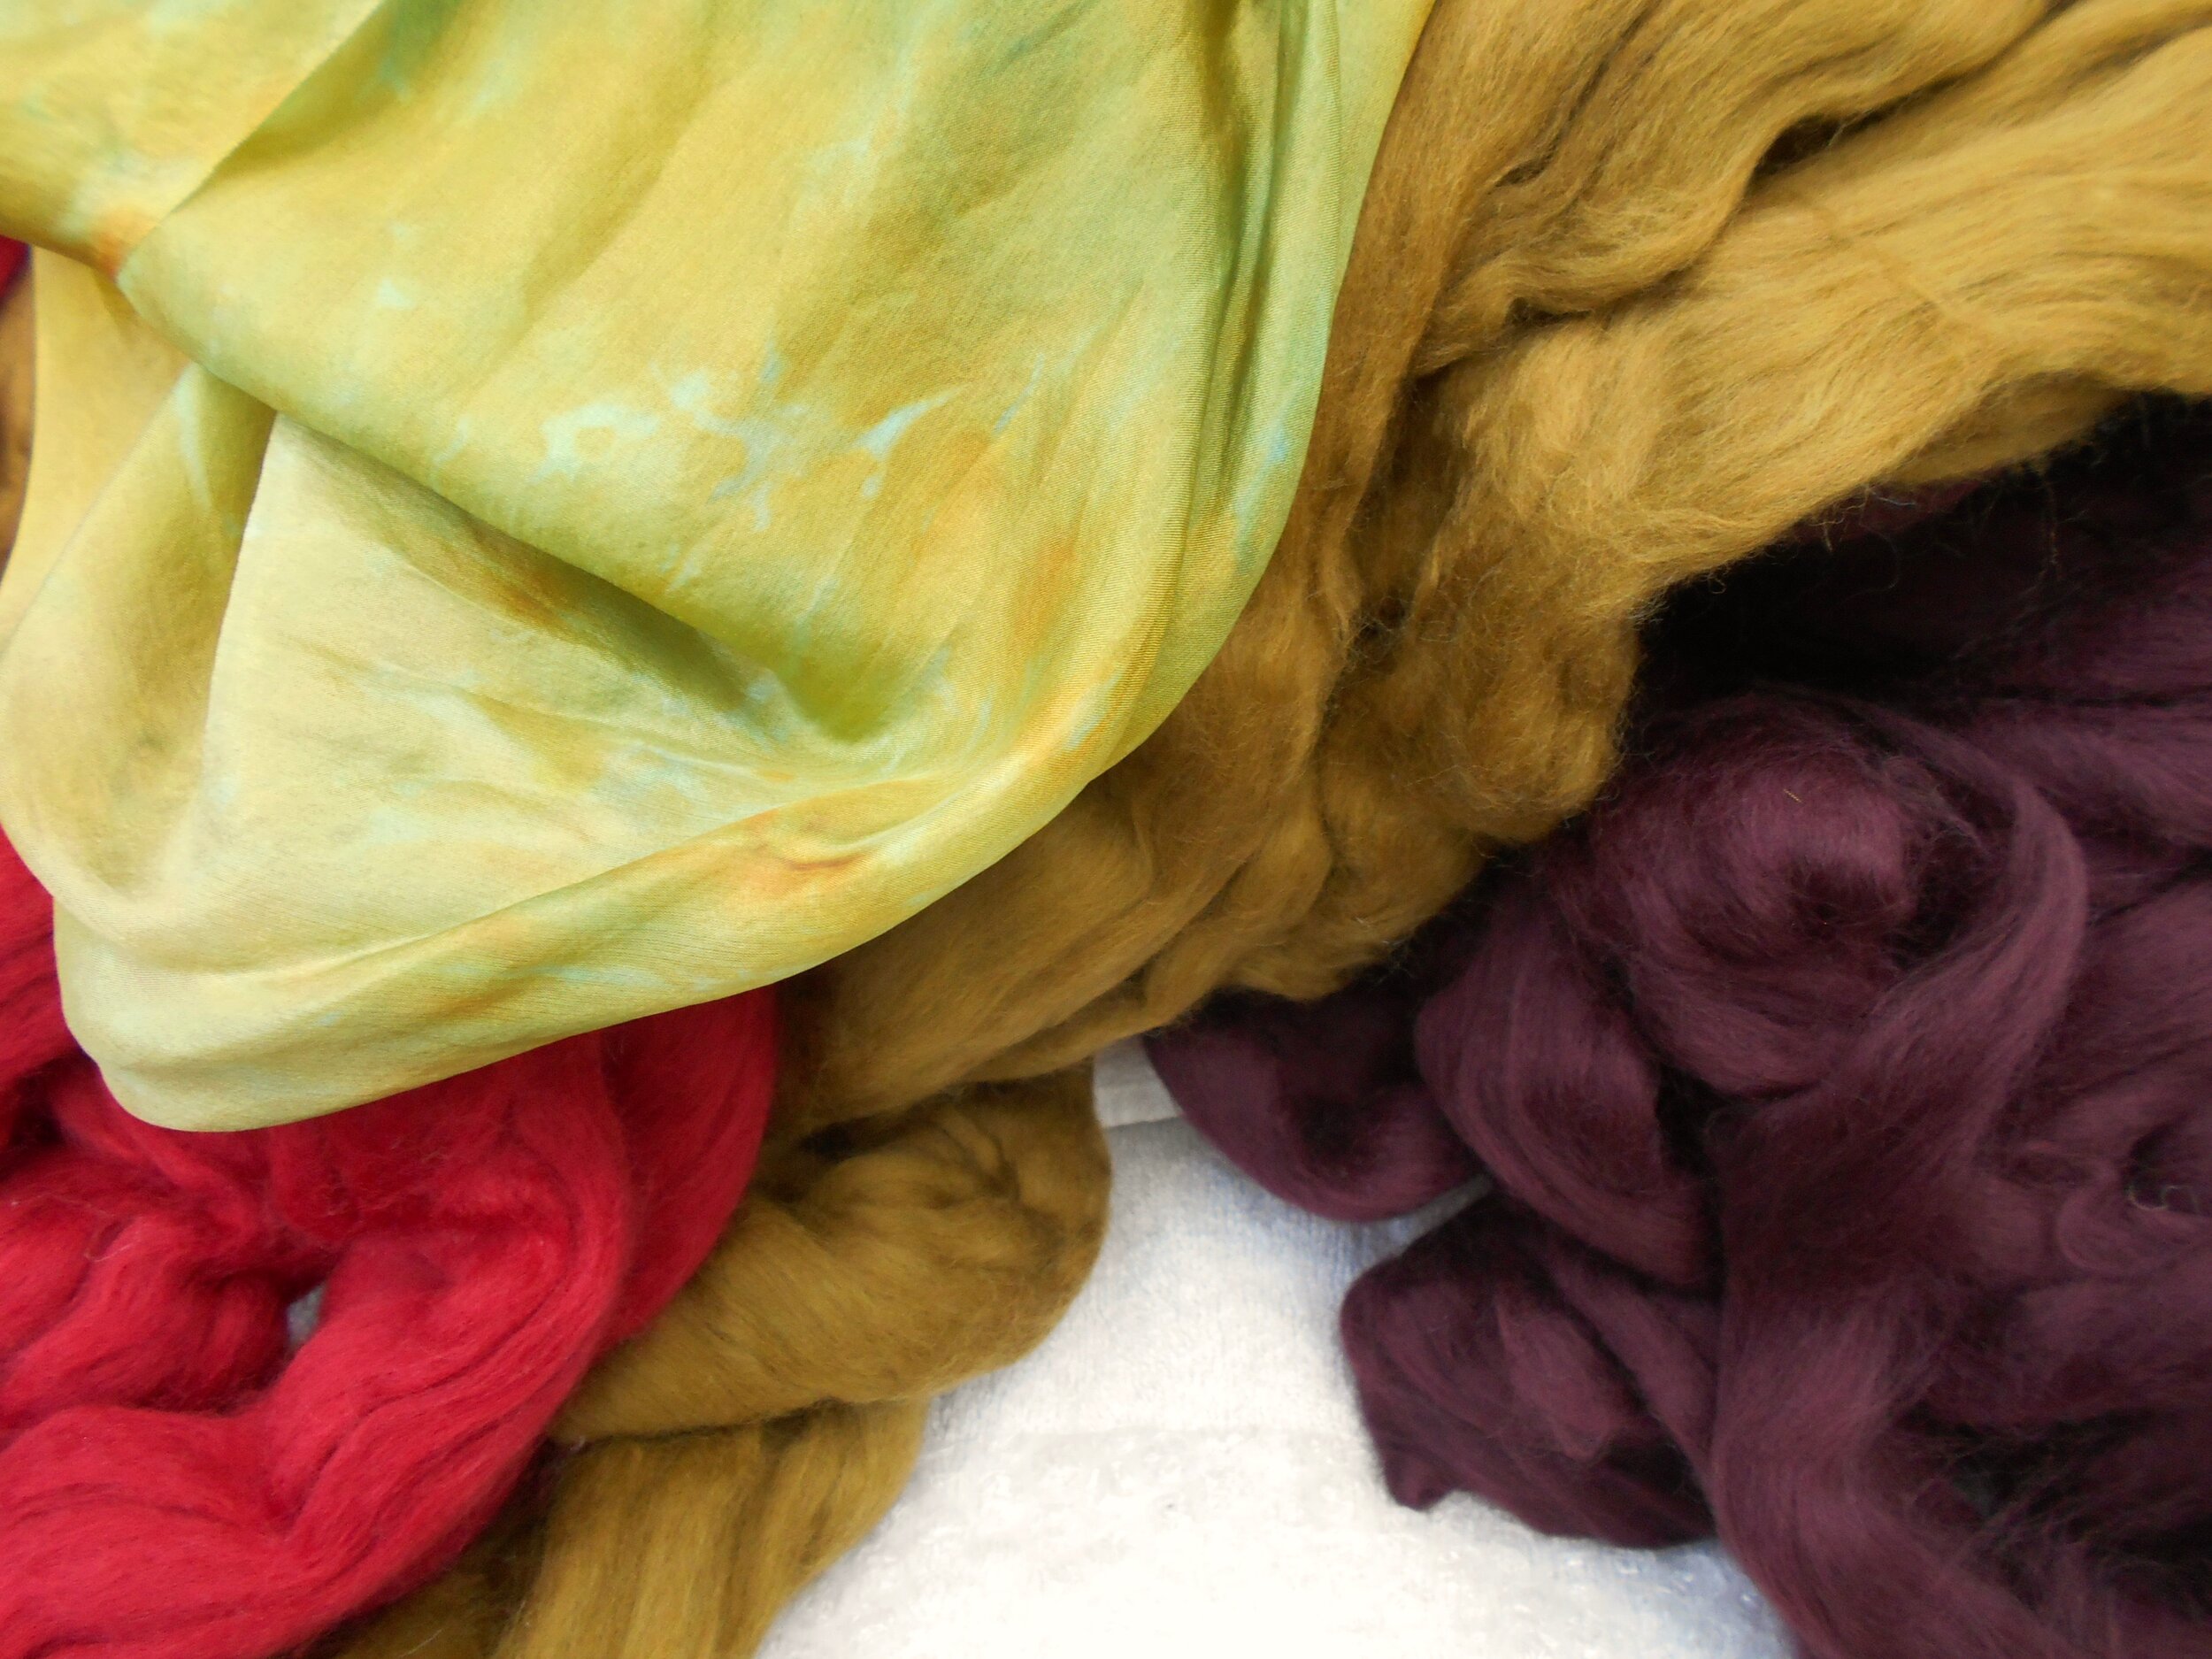
Merino wool tops with the chosen shade of green silk to compliment the red and mulberry tones
Because each piece is hand-dyed, when I have the results, I will then begin the process of matching the silk to various shades of wool that I think will compliment it. At this stage I must have a white background, and remove any other colours from the pile, as other shades that are too physically close, distort what I see.
Sometimes the decision is quick and obvious, sometimes much “playing'“ with a variety of combinations, which is why I describe my work as ‘playing with colour’, as there always seem to be endless possibilities!
Once I have decided on the colour combination for the piece, I will lay up the wools over a template I made earlier.
My work is not ‘cut’ to shape or size, in that each item is made as the final piece from scratch, using careful calculations. This guarantees the correct size of the finished scarf, as the process will cause a 30% shrinkage from the beginnings to the final item.
The process I use is called ‘wet felting’, and the fibres are laid up by hand, making sure layers are at a 90° angle to each other. This is a highly relaxing and gentle part of the process, merging and overlapping the colours as they go from one to the next. At this point I will have created a lovely fluffy pile of colour! These layers are what will create the fabric itself.
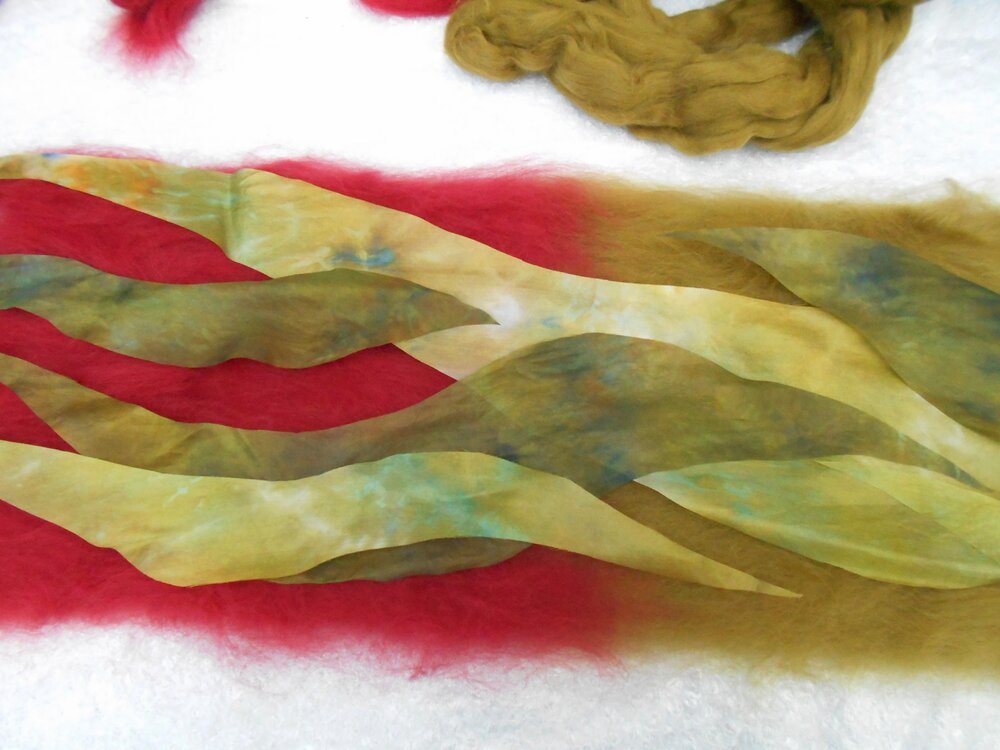
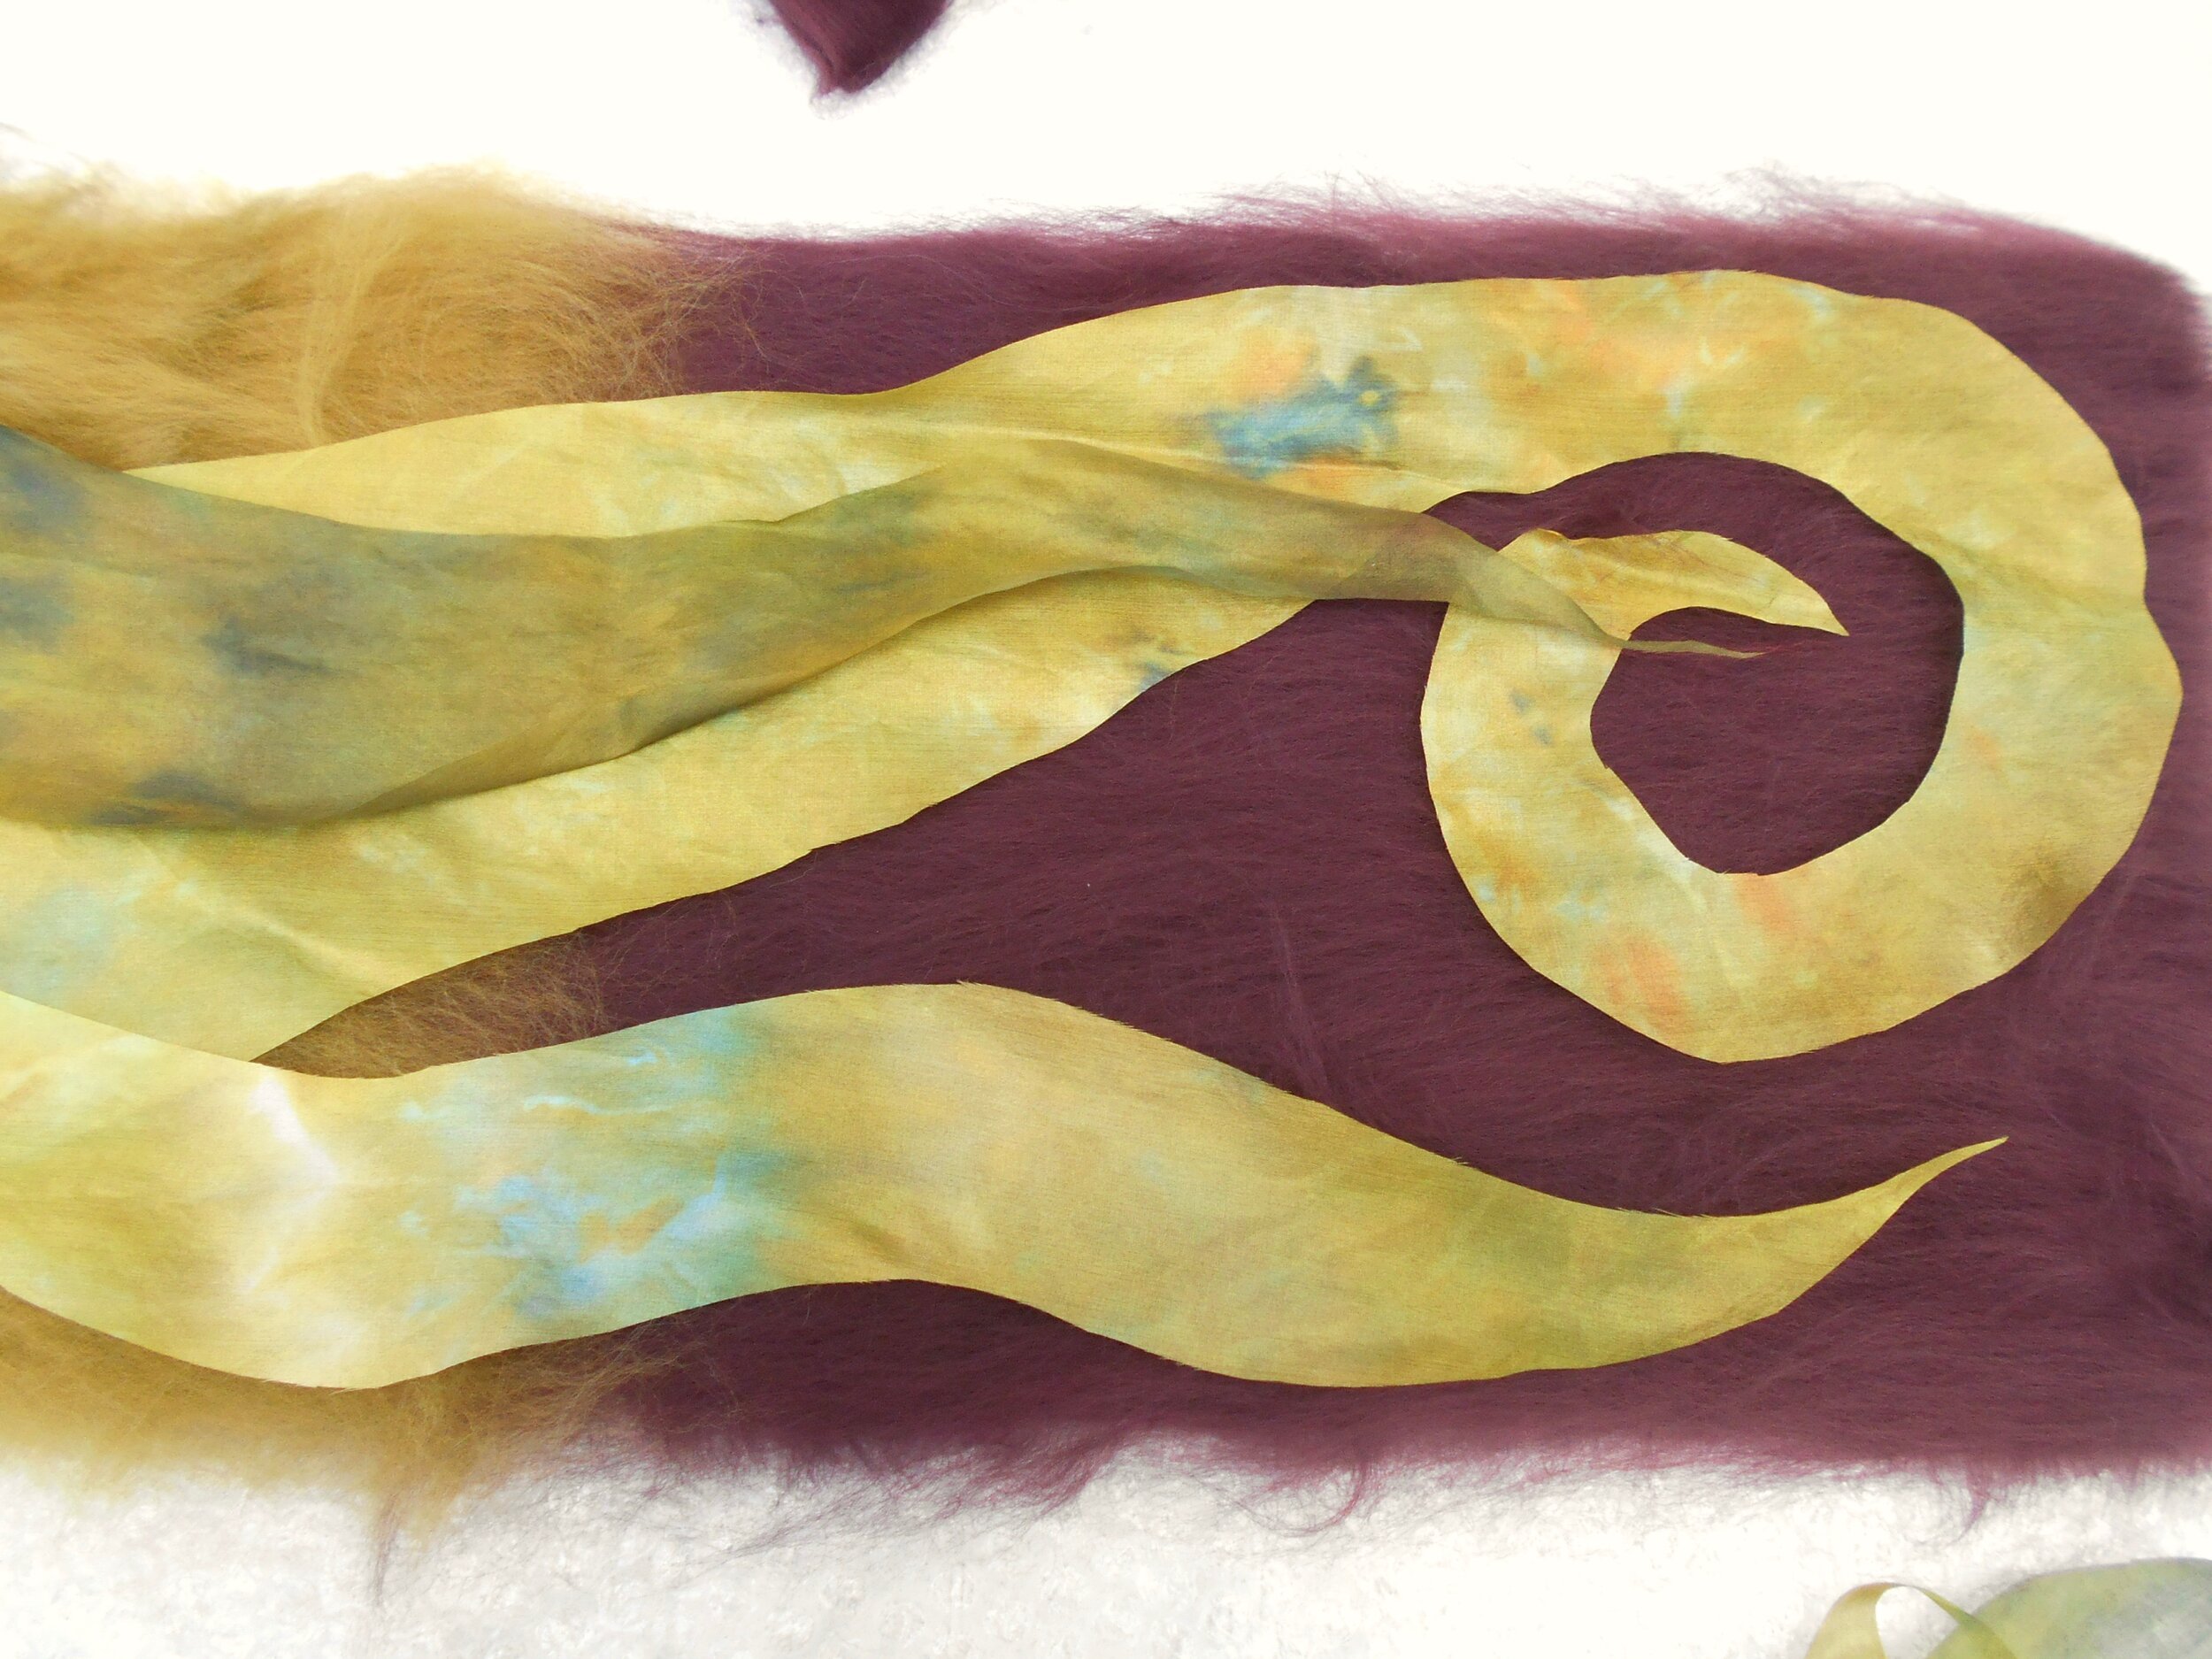
Hand cut silk fabric is then laid up to create the design
With my fluffy ‘cushion’ of wool, I will then start working on the top layer of silk decoration. The art of combining wool and fabric felted together comes under the term ‘nuno felting’. I often work on a base of fabric, layered between wool, but in this case the fabric is purely laid over the top wool layer. I build the design as I go, free hand cutting the silk - depending on which patterns of dye is where, and where different shades and shapes will compliment each other
From this point onwards, the physical hard work begins.
To felt the fibres together, I use hand-hot water with olive oil soap (to keep my hands soft), and the whole piece is then wetted thoroughly, and rubbed.
The use of heat, moisture and friction, causes the fibres to ‘lock’ together. Many people may relate to putting a wool jumper in the washing machine on the wrong wash - where the mix of too much heat and friction have sadly returned their jumper 3 sizes too small! This is the same concept - but done in a controlled way!
I will work on both sides of the scarf, and as the fibres lock together, the wool layers and silk combine to become one piece of fabric. I ensure the edges are tucked in as I work, shaping it as I go, frequently turning the work, squeezing out water when it is cold, and reapplying hot water.
When the wool fibres and silk are firmly felted together, the final part of the process is called ‘fulling’, and many Felters may use a bamboo mat to work with.
I don’t - I throw the entire piece of work as hard as I can on my work table! I have a very sturdy table and if you are ever feeling the need to let off steam - this is an excellent way!! Otherwise throwing your work in time to music is much more fun :)
As this process takes place, I will witness the scarf shrinking slowly towards what will become it’s final size. The silk fabric on top will become increasingly textured during this process.
When the scarf is the correct size, and is firm but pliable - I know I have reached the end of my process. The soap is then rinsed out, it is then shaped on my towel whilst wet and left to dry naturally.
And then it waits for it’s new owner to claim it :)

